minimal configuration tasks. In this post, we'll be managing pesx0
through the Windows-based vSphere client which is loaded on fenster.
(fenster is the Windows 2008 management VM that we setup in part 2.)
Some of the following may appear trivial, though I prefer to be fairly
thorough. Additionally, some of the following is simply representative
of the particular talking point while allowing me to retain my existing
lab configuration, rather than fully rebuilding it for the purpose of
documentation. Our setup details for this are:
        HOSTS:          pesx0.lab.none (10.0.129.200), fenster.lab.none (10.0.129.145)
        VMs:            dstor0, vrout0, vesx0, vesx1
So to start things off, log into the fenster and launch the vSphere client:
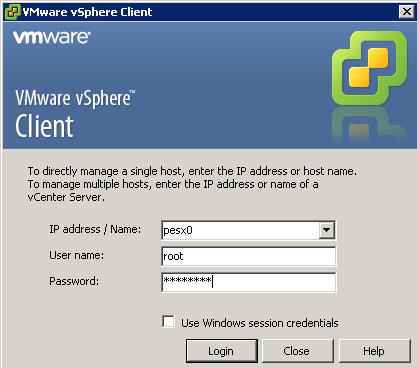
The first time we connect to an ESXi host or vCenter installation, a
security warning will be displayed. Select the checkbox at the bottom
to “Install this certificate...”, then click 'Ignore'. Since we
are using an evaluation version of ESXi, you'll likely an evaluation
notice detailing how many days are left until the eval license expires,
simply click 'OK' to move on. After login, we are automatically presented
with our “Summary” tab for pesx0 (or the “Getting started” tab
if you didn't disable it in the client settings):
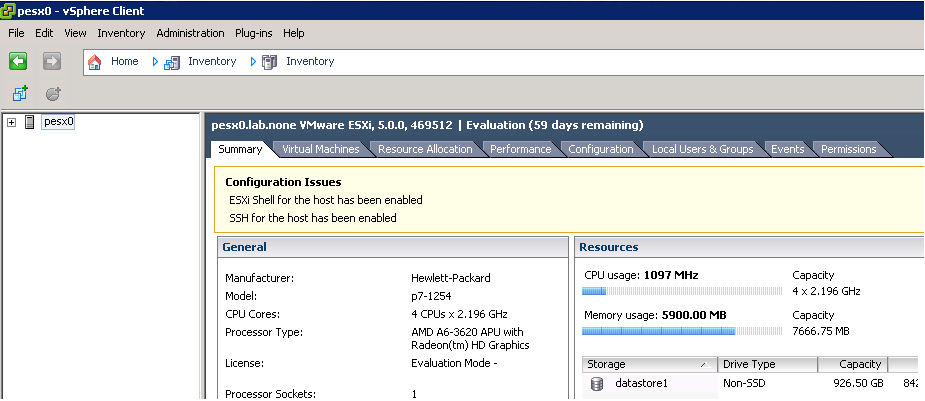
From here, the first thing we'll do is configure the underlying network
infrastructure that our VMs and nested VMs will use. Click on the
“Configuration” tab in the right pane and under “Hardware”, select
“Networking”. By default, we'll have 1 standard vSwitch already
configured by way of our configuration of the “management network”
in part 3. (Yes, I already have at least 7 VMs configured in my setup.):
vSwitch0 above will support our management network traffic and a link
for all of our traffic to the “world.” I've opted to support
the rest of the internal virtual network infrastructure on a second
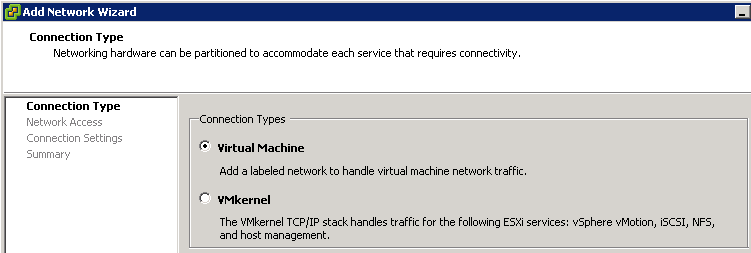
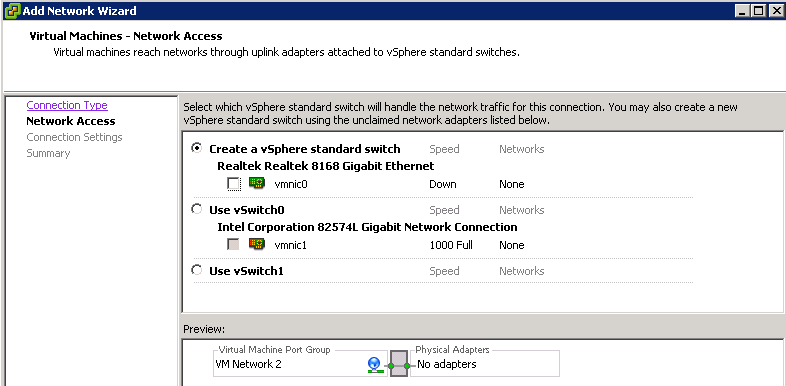
vSwitch (vSwitch1). To add it, click on “Add Networking...” in the
top right. When creating a new vSwitch, we'll be choosing a “Virtual
Machine” connection type which will also allow us to create our first
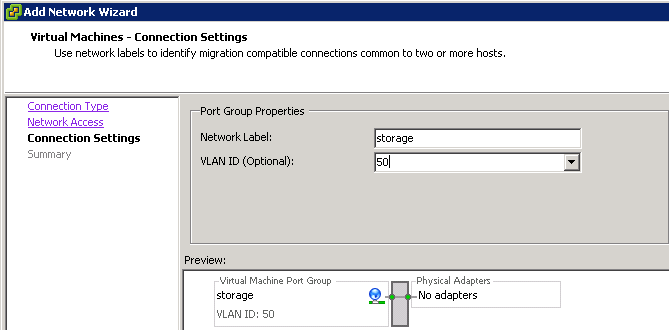
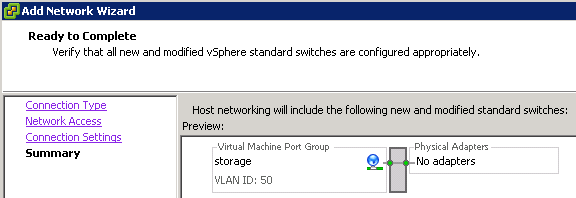
port group on this vSwitch. The following screens detail the setup for
the “storage” port group (a stand in for “storlan”, VLAN 20).
Of note, we will not bind it to any physical network interface:
Once this is complete, we can add the other two port groups (vmonet (VLAN
30) and vmhosts (VLAN 40)) simply by clicking on the “Properties”
option beside vSwitch1. (At the bottom of the “Properties” window
is an “Add” button which will bring up the same screens seen above.
Rather than creating a new vSwitch, though, it will simply add the new
port groups to the existing vSwitch.
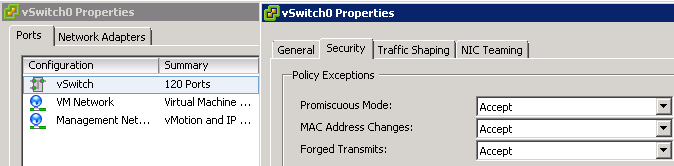
Since everything is virtualized, we'll need to make a few changes to
both vSwitch0 and vSwitch1, such as enabling “Promiscuous Mode”
on the vSwitches. (Note, we won't be doing this for our vSwitches
on our virtualized ESXi hosts, we're only doing it for those on the
physical host. This allows network communication through to the nested
virtual networks hosted by our virtual ESXi hosts.) So, click on the
“Properties” option beside vSwitch0. On the “Properties” window
with “vSwitch” highlighted, click “Edit” at the bottom to get a
new properties window. Under the “Security” tab on the new window,
enable “Promiscuous Mode”, then close out of the properties screens:
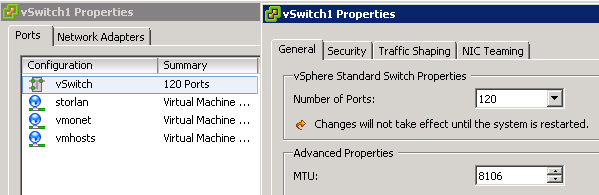
Do the same for vSwitch1, but this time, leave the secondary window open.
After enabling “Promiscuous Mode”, go back to the “General”
tab so that we can adjust the MTU to 8106 (the datastore (Solaris) I've
chosen to use only supports an MTU of up to 8106 on the vNICs that are
presented to it). The point here is we're enabling jumbo frames for
vSwitch1 since it will be supporting both vMotion and iSCSI traffic:
Once done setting the MTU, close out all properties screens and our
network infrastructure on pesx0 is complete. In part 5, we'll begin
setting up our VMs.
see also:
vSphere 5 Lab Setup pt 1: The Overview
vSphere 5 Lab Setup pt 2: The Management Hosts
vSphere 5 Lab Setup pt 3: Installing the Physical ESXi Host
vSphere 5 Lab Setup pt 5: Infrastructure VM Creation
vSphere 5 Lab Setup pt 6: Infrastructure VM Configurations and Boot Images
vSphere 5 Lab Setup pt 7: First VM Boot